In this article:
For many aspiring entrepreneurs, starting a business often begins with a simple idea, a small investment, or the desire to turn a passion into a source of income.
But turning that idea into a legitimate, operational business comes with a different set of challenges: completing different permits, business registrations, and tax requirements that can feel intimidating for first-time business owners.
At Globe Business, we know that the early stages of building a business can feel overwhelming. Beyond meeting legal requirements, new business owners need support in setting up the right systems.
As a trusted partner to growing enterprises, we help navigate these steps and prepare businesses for the demands of a digital economy.
This guide walks you through the essential steps in business registration in the Philippines, as well as the foundational systems you need to build and grow your business with confidence.
Step 1: Register Your Business
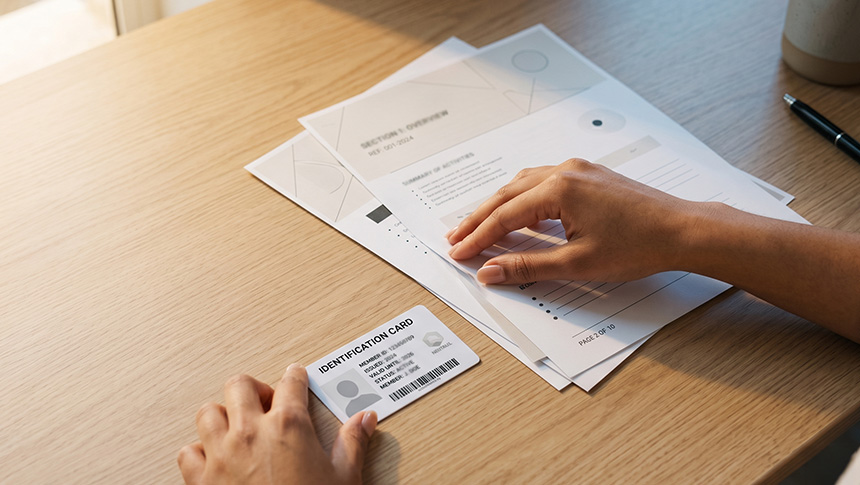
Before you can register with the BIR, you need to secure a few foundational documents. Here is what you will need and where to get them.
Required Documents
- Valid government-issued ID
- Barangay Clearance from the barangay where your business will operate
- Mayor's Permit or Business Permit from your city or municipal hall
- Department of Trade and Industry (DTI) Certificate of Business Name Registration
- DTI Trustmark
How to Get Your Barangay Clearance
A barangay clearance certifies that you are a registered resident in good standing within the community. It is one of the first requirements you need to process before everything else.
How to Register Your Business Name with the DTI
Registering your business name with the DTI gives you the exclusive legal right to use it within your coverage area.
Steps to Register Online
- Go to the DTI Business Name Registration System online portal.
- Check if your desired business name is still available.
- Fill out the registration form with accurate information.
- Pay the registration fee online via debit or credit card, bank transfer, or GCash.
Territorial Scope | Amount + Document Stamp |
Barangay | ₱200.00 + ₱30.00 |
City / Municipality | ₱500.00 + ₱30.00 |
Regional | ₱1,000.00 + ₱30.00 |
National | ₱2,000.00 + ₱30.00 |
Note: Once you register, you cannot change your Business Owner's Name or Trade Name, so double-check all information before submitting. After payment, keep the transaction page open to get your Reference Code.
- Save your Reference Code after payment. You will need this to download your DTI Certificate.
- Go to the DTI Certificate Verification page and enter your Reference Code. Click your business name to receive a verification code via email.
- Enter the verification code and download your DTI Certificate.
Note: You must register with the BIR within 30 days of your DTI registration to avoid penalties.
How to Get Your Mayor's Permit or Business Permit
Once you have your DTI Certificate, bring it along with your Barangay Clearance to your city hall or municipal hall. Look for the Business Permit and Licensing Office (BPLO). Then, complete the application form and pay the applicable fee.
Tip: If the office asks for a notarized certificate of your annual sales, inform them that you are just starting your business
Step 2: Complete Legal Requirements
With your Barangay Clearance, DTI Certificate, and Mayor's Permit in hand, you are now ready to register with the BIR and get your Certificate of Registration.
How to Register with the BIR
Visit the nearest Revenue District Office (RDO) in your area. Make sure you have a Tax Identification Number (TIN) before heading there.
You can also do this online, though note that the TIN release may take longer and may require a follow-up email to the RDO.
If You Do Not Have a TIN Yet
- Visit the ORUS (Online Registration and Update System) website.
- Click "New Registration," then "As An Individual" to create an account.
- Select your business type.
- Single Proprietorship: If you have a physical store or are rendering services
- Single Proprietorship (Digital Service Providers): If you are a Shopee, Lazada, or TikTok Shop seller
- Fill out all required information and submit.
- Wait for one to two business days for an email from the BIR confirming your application status.
- Once approved, return to ORUS to retrieve your TIN.
If You Already Have a TIN
- Download BIR Form 1901 from the BIR website.
- Fill in all required fields, including your DTI Registered ID Number and Trade Name on Page 2, Part V.
- On Part VIII (Invoices), indicate whether you are VAT or Non-VAT registered, and fill in details for your invoice request from a BIR-accredited printer.
- Sign Pages 3 and 4 of the form before submission.
Tip: You may also apply for your Certificate of Registration through the ORUS website if you already have a TIN—this is typically the faster option.
After BIR Approval
Once the BIR approves your registration, you will receive an email notification. You can then claim your BIR Form 2303 (Certificate of Registration) and the "Ask for Receipt" signage at the RDO where you registered. Both must be displayed prominently in your place of business.
Tip: Scan the originals of your BIR Form 2303 and Ask for Receipt notice. Place them in a picture frame or have them laminated for display. Keep the original copies stored safely.
How to Get Your DTI Trustmark (For Online Businesses)
As of September 2025, the DTI requires online business owners to obtain a DTI Trustmark.1 It serves as an official recognition that your online store is legitimate, trustworthy, and compliant with e-commerce regulations in the Philippines.
Steps to Apply
- Go to the DTI Trustmark website and click “Register.”
- Fill in your business information. Make sure it exactly matches your DTI Certificate and BIR Certificate of Registration.
- Log in and click “New Registration” from your dashboard.
- Read and accept the Terms and Conditions.
- Fill in your business details and address.
- Prepare and upload these documents.
- DTI Certificate
- BIR Certificate of Registration
- List of digital platforms where you sell (Shopee, Lazada, TikTok Shop, for example)
- Barangay Micro Business Enterprise (BMBE) Certificate (if applicable)
- Download the Internal Redress Mechanism (IRM) template, fill in the highlighted sections, save as PDF, and upload it.
- Review your registration summary, click “Submit,” confirm your undertaking, and wait for a confirmation email.
- Allow up to seven working days for approval and QR code delivery.
Estimated Cost of Business Registration
Below is a rough breakdown of the costs you can expect when registering your business. Note that actual costs will vary based on your location, business size, and local government rates.
| Requirement | Estimated Cost |
| DTI Certificate | ₱530 – ₱2,030 |
| DTI Trustmark | ₱1,000 – ₱2,130 |
| Mayor's Permit/Business Permit | ₱2,000 – ₱10,000 |
| BIR Registration | ₱1,500 – ₱2,000 |
| Health/Sanitary/ Other Permits (optional) | ₱500 – ₱2,000 |
| Barangay Clearance | ₱300 – ₱1,000 |
| TOTAL | ₱5,830 – ₱19,160 |
Step 3: Secure Your Official Receipts
Official receipts are not just a legal requirement; they are a sign of professionalism that helps build customer trust. All registered businesses must obtain an Authority to Print (ATP) from the BIR before having their receipts printed at a BIR-accredited printer.
Note: Answer item 42 on page 3 of BIR Form 1901 (Part VIII) to request printed invoices from a BIR-accredited printer. An accredited printer must print your receipts for them to be considered valid.
Requirements for ATP Application
- Accomplished BIR Form 1906
- Photocopy of BIR Certificate of Registration (Form 2303)
- Special Power of Attorney (for the individual taxpayer)
- Secretary's Certificate authorizing the representative and printing company to process the ATP
- Sample layout of a receipt or invoice
- BIR accreditation certificate of your chosen printing company
Submit all requirements to the RDO that has jurisdiction over your business address.
VAT vs. Non-VAT: What Type of Receipt Should You Issue?
The type of official receipt you issue depends on whether you are VAT-registered or Non-VAT registered.
| VAT-Registered | Non-VAT Registered |
| Issue a VAT Invoice for every sale, exchange, or lease of goods or property, and for every service rendered, regardless of the transaction amount. | Issue a non-VAT Invoice for all transactions of ₱500 or more. You must still issue one for a transaction below ₱500 if the customer requests it. |
Note: You will indicate whether you are VAT or Non-VAT in item 41B on Page 3 of BIR Form 1901 (Part VIII).
Now that you know which type of receipt to issue, it is helpful to understand the difference between VAT and Non-VAT and determine which category your business falls under.
Understanding the Difference: VAT vs. Non-VAT
A VAT-registered business charges its customers an additional 12% Value-Added Tax on top of the selling price and remits this to the BIR. In exchange, the business can claim input tax credits, allowing it to deduct the VAT paid on purchases from the VAT it owes, thereby significantly reducing its tax liability.
On the other hand, a non-VAT registered business does not charge VAT to its customers. Instead, it pays a 3% percentage tax on its gross receipts. This arrangement is less complex and often more manageable for small businesses with limited administrative capacity.
How Do You Decide Which One You Should Be?

The primary factor is your annual gross sales or receipts.
- If your annual gross sales are below ₱3,000,000, you are eligible to register as Non-VAT. This is the typical starting point for small business owners and micro-enterprises.
- If your annual gross sales reach or exceed ₱3,000,000, you must register for VAT. You are required to register within 30 days of crossing this threshold.
Beyond the threshold, here are additional factors to consider.
- If you primarily serve other businesses (B2B), many prefer VAT-registered suppliers because they can use your VAT invoices to claim input tax credits. Being VAT-registered can make you a more attractive business partner.
- If your business makes significant purchases (e.g., from manufacturers or resellers), being VAT-registered lets you recover the VAT paid on those items, resulting in real savings.
- You can voluntarily register for VAT even if you have not hit the ₱3 million threshold, if you anticipate growth or want to seek tax credits.
Note: To switch from non-VAT to VAT, simply fill out BIR Form 1905 and submit it with your Certificate of Registration, Ask for Receipt notice, and official receipts.
Use Digital Tools to Run Your Business Efficiently
Now that you have learned how to register a business in the Philippines and are officially up and running, it is time to set yourself up for long-term success.
Globe Business, the connectivity backbone enabling digital-ready businesses, understands that managing your finances, tracking your sales, and staying on top of your tax obligations can be overwhelming without the right tools.
That is why we offer a range of digital solutions tailored to your needs. From mobile plans and fiber internet to payroll tools and SMS marketing, we have options for you, whether you are just starting, growing your team, or scaling your online reach.
Sources:
1https://mb.com.ph/2025/09/12/dti-to-mandate-digital-trustmark-for-all-online-businesses
https://taxease.ph/