In this article:
- How to Set Up Globe Cloud
- How to Manage Your Globe Cloud Account
- Tips for Getting the Most Out of Your Globe Cloud Account
- FAQs About Globe Cloud
- Keeping Your Memories Alive with Globe Cloud
Saving memories lets you hold on to the stories behind everyday experiences. From holiday travels to simple family celebrations, and even hobbies like working out and storytelling projects, media files can capture moments you want to remember.
Online storage like Globe Cloud keeps them all in one place, so you can relive your favorite stories and easily make room for new ones. Learning how to set it up is the first step to getting more out of your subscription. That way, every trip, workout, and new experience has a place for every highlight you collect.
How to Set Up Globe Cloud
Having your Globe Cloud account ready makes it easier to keep your digital content organized and backed up on Android. Globe Cloud is coming soon on iOS.

Downloading and Activating Your Globe Cloud Account
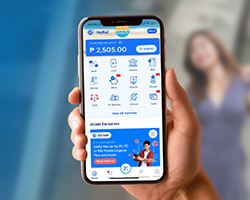
You can subscribe to a Globe Cloud plan through the GlobeOne app. Once it’s installed on your phone, you can create your account and activate your subscription.
- Open your GlobeOne app and tap the “Globe Cloud” banner on the homepage.
You can also tap “View All” under “How Can We Help You?” From there, scroll to the bottom and tap “Explore More of Globe.” Then, select “Globe Cloud” under “Globe Products.”
- Choose your preferred storage plan and link it by creating your new Globe Cloud account.
- Complete your payment securely using GCash.
- Check your email for the confirmation message and tap the provided activation link.
- Download the standalone Globe Cloud app from the Google Play Store.
- Open the app, sign in with your registered email, and accept the “Terms and Conditions.”
- Grant the app permission to access your files to start managing your backups immediately.
Setting Up Automatic Backups
When you turn on automatic backups, your uploads go directly to your Globe Cloud account as you add new files. Grant the app permission so you can access your latest photos and videos whenever you need them.
- Open the Globe Cloud app.
- Allow the app to access your photos and videos when prompted.
- Enable location access, so backups can run securely in the background.
- Choose the content you want to back up, such as “Photos,” “Videos,” “Contacts,” or “Favorites.”
- Complete the setup to automatically save your selected content.
Pro Tip: Backing up large photo albums and high-resolution videos works best with a stable home internet connection. Broadband fiber internet gives you consistent speeds for uploading an entire gallery in one sitting, while a prepaid fiber connection makes it easy to top up whenever you need to access, download, or restore important files.
Organizing and Accessing Your Files Across Devices
Keeping your files organized also makes them easier to access across your gadgets, especially after activating your automatic backups. So when it’s time to revisit vacation photos or an important presentation, you can pull the files up as soon as possible.
- Sign in to Globe Cloud first with your registered email address on any supported phone, web browser, or desktop app.
- Open the “Home” tab, then select “Photos” and “Memories” to browse your automatically synced media library.
- Use “Albums” to organize your collection or AI-powered “Flashbacks” to review past moments.
- Open “Utilities,” then select “Private Folder” to secure sensitive files with a PIN or biometric authentication.
- Search, browse, and share your synced files across your connected devices.
How to Manage Your Globe Cloud Account
Reviewing or adjusting your Globe Cloud plan helps you ensure you’re using the option that best fits your saved files. You can manage your subscription, change your storage plan, and complete other account transactions through the GlobeOne app.
- Open your GlobeOne app and tap the “Globe Cloud” banner on the homepage.
You can also tap “View All” under “How Can We Help You?” From there, scroll to the bottom and tap “Explore More of Globe.” Then, select “Globe Cloud” under “Globe Products.”
- Select the account you want to manage, then tap “Continue.”
- On the Dashboard, tap “Manage Account,” then “Change Plan.” You can also tap “Change Plan” under “Quick Links.”
Select the storage plan you’d like to switch to. Choose among 50 GB for ₱39/30 days, 200 GB for ₱169/30 days, 1 TB for ₱379/30 days, or 2 TB for ₱499/30 days.
Plan
Price
What You Can Use It For
50 GB ₱39/30 days - Storing schoolwork
- Saving photos and important files
200 GB ₱169/30 days - Building a growing photo collection
- Keeping video and file collections
1 TB ₱379/30 days - Preserving family memories
- Storing large media libraries
2 TB ₱499/30 days - Managing extensive collections
- Saving small businesses' and creators' outputs.
- Complete your payment using GCash, then confirm your transaction. Your new storage limit and 30-day billing cycle will take effect immediately, and any unused days from your previous tier won’t be refunded.
If you decide to end your subscription, you’ll still have access to your files and can download them until your current billing period ends.
Tips for Getting the Most Out of Your Globe Cloud Account
After setting up your account, a few simple habits can help you get even more from your subscription. These can also keep your account in good shape and ready whenever you need it.
Choose the right backup settings.
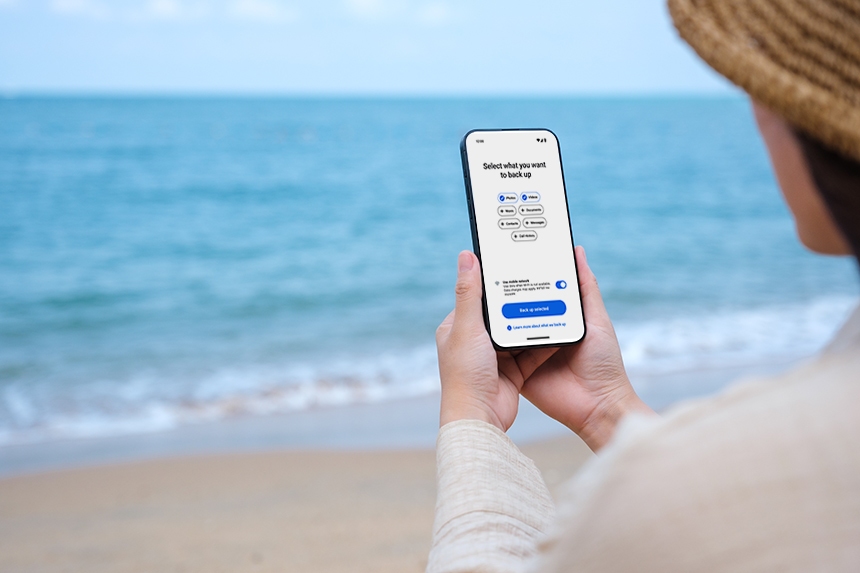
There are personalized preferences you can set in your Globe Cloud to suit how you use the app. Choose which media and folders to include in your backups, then decide whether they should happen automatically or only when you’re connected to WiFi to help manage mobile data usage.
Regularly review your storage usage.
Your storage needs can change over time, especially after downloading large files for offline access or saving months’ worth of app downloads. A quick storage check lets you know if your current plan still has enough space or if it’s time to upgrade.
Keep your subscription and payment details updated.
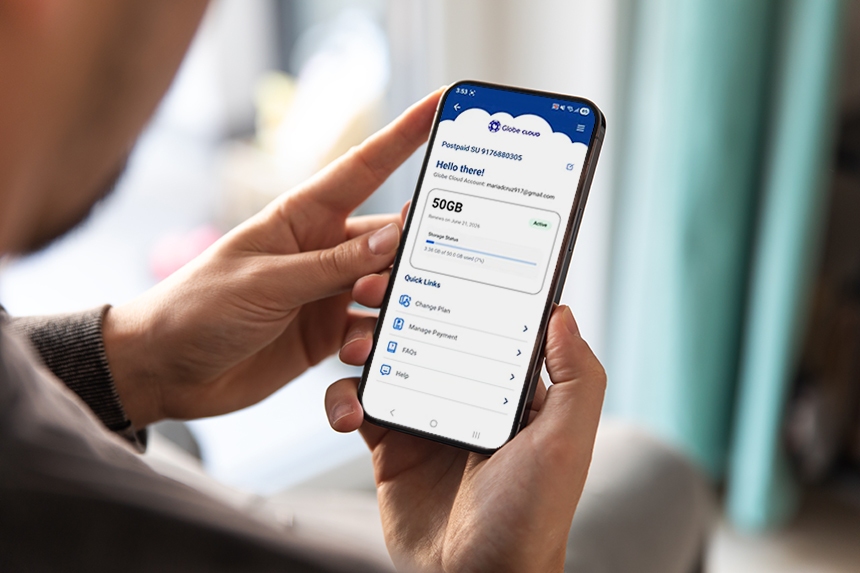
A quick review of your subscription status and payment method can help keep your Globe Cloud account running without interruption. If an auto-renewal payment isn’t successful, simply tap “Pay Now” or “Retry Payment” on your account dashboard to complete your payment before the 30-day grace period ends.
Know how to restore your files.
A phone reset, accidental deletion, or unexpected software issue can interrupt your day when important files suddenly go missing.
To restore them, go to the Globe Cloud dashboard, locate the files in the “Trash” or “Bin” folder, then tap “Restore.” Now, you can quickly get back to sending important deliverables to clients or to your thesis groupmates.
FAQs About Globe Cloud
Using the cloud service is straightforward, but you may still have a few questions along the way. Here are answers to some of the most common ones to ensure you understand everything the system has to offer.
What’s Globe Cloud?
Globe Cloud is a personal cloud service that gives you a secure place to back up and access your photos, videos, and files across supported devices. That means your important content stays within reach whenever you need it.
Can I change my storage plan anytime?
Yes. You can change your storage plan anytime through your Globe Cloud Account Dashboard on the GlobeOne app. This makes it easy to switch to a plan that suits your storage needs.
How does the billing work when I upgrade my plan?
Your upgraded storage plan takes effect immediately, and your billing cycle resets to the date of your upgrade. Any unused time from your previous plan won’t be refunded.
What happens if I want to downgrade my plan?
Your storage plan will be downgraded immediately while keeping your current billing cycle and due date at the lower rate. If your stored files exceed your new plan’s storage limit, you’ll need to free up space first. Otherwise, your account will become read-only.
What happens to my files if my monthly payment fails?
Globe will automatically retry charging your GCash account up to four times. You can also tap “Retry Payment” under “Manage Payment” on your dashboard to settle your balance manually. If payment isn’t completed after two attempts, your account will be archived, and you’ll have 30 days to pay before your files are permanently deleted.
Keeping Your Memories Alive with Globe Cloud
From family milestones and travel adventures to school requirements and everyday snapshots, your phone holds more than just files. It holds the moments worth keeping.
Staying connected to those files while you’re away from home starts with the right mobile plan. A postpaid plan gives you generous data for uploading high-resolution photos and 4K videos from all kinds of moments, whether you’re at a concert, a sports game, or a weekend art fair. Meanwhile, prepaid promos work just as well for the flexibility of topping up only when you need to pull up old photos or check saved files.
Once Globe Cloud and your connection are set up, you can spend less time worrying about your treasured files and more time enjoying the moments that matter.